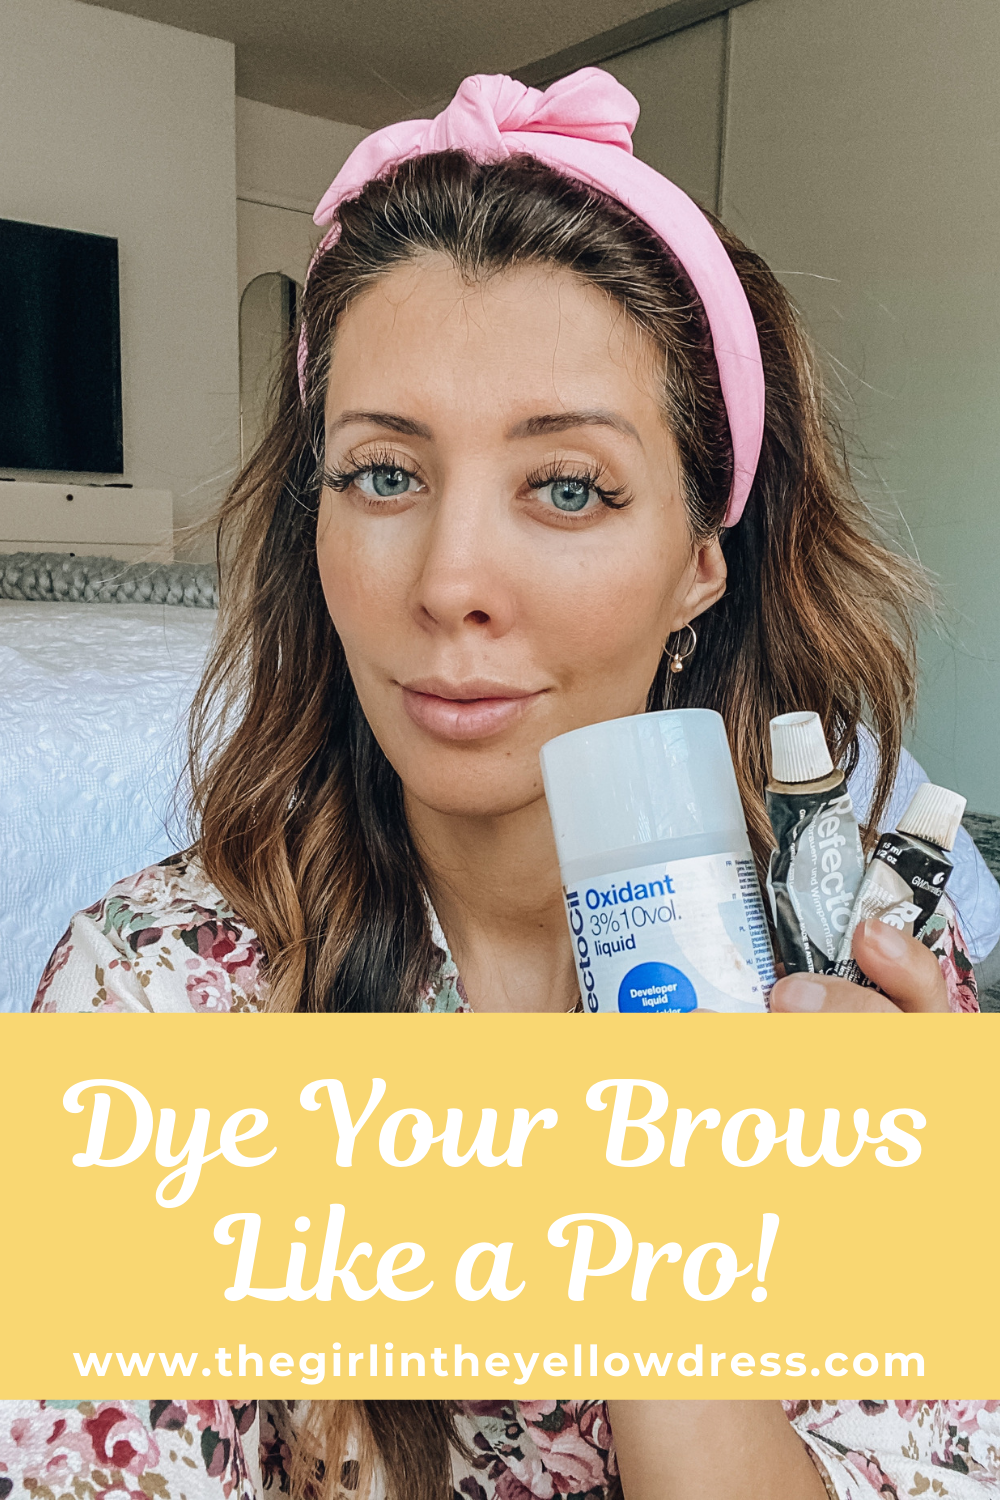
Everyone loves the look of full brows, but it can be tiresome to have to fill them in every day, right? I’m going to show you how easy it is to get professionally dyed brows from home without breaking the bank!
Here’s the supplies you need to get professionally dyed brows from home:
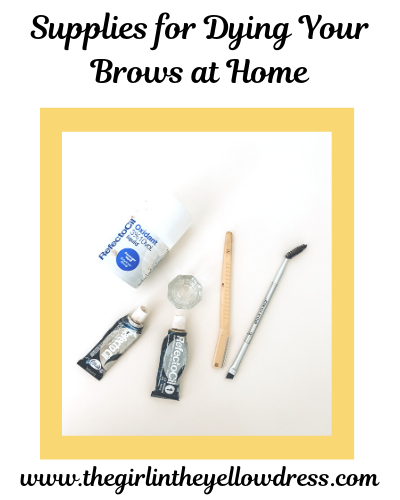

I do this once a month at home. It saves me a lot of money and time at the salon by doing this myself. I get my supplies off of Amazon. Here’s what you need:
Eyebrow Brush
Eyebrow Razor (I use an old razor to mix the shades together)

I like to always start with clean skin when I dye my brows at home. This way I’m not worrying about my makeup getting smudged or getting mixed in with my brow dye. Here’s what my brows looked like before I dyed them.
Step 1
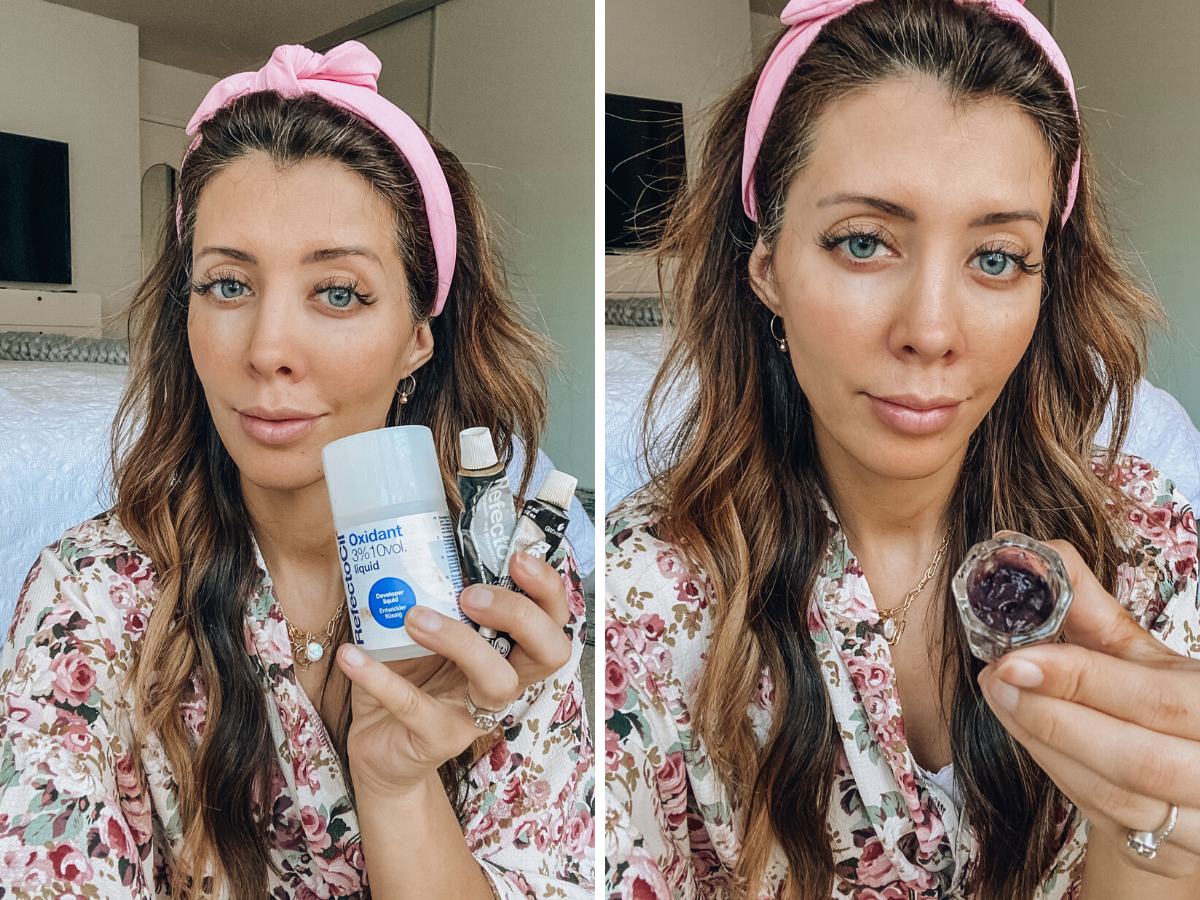
Take the mixing glass that comes in the kit and mix your dye colors. I use equal parts of shades 1 and 3. Once I have the colors in the glass, I add the activator and stir everything together until it thickens a little. You don’t want it too thick, but you need it thick enough that it won’t run down your face when you apply it on your brows.
Step 2
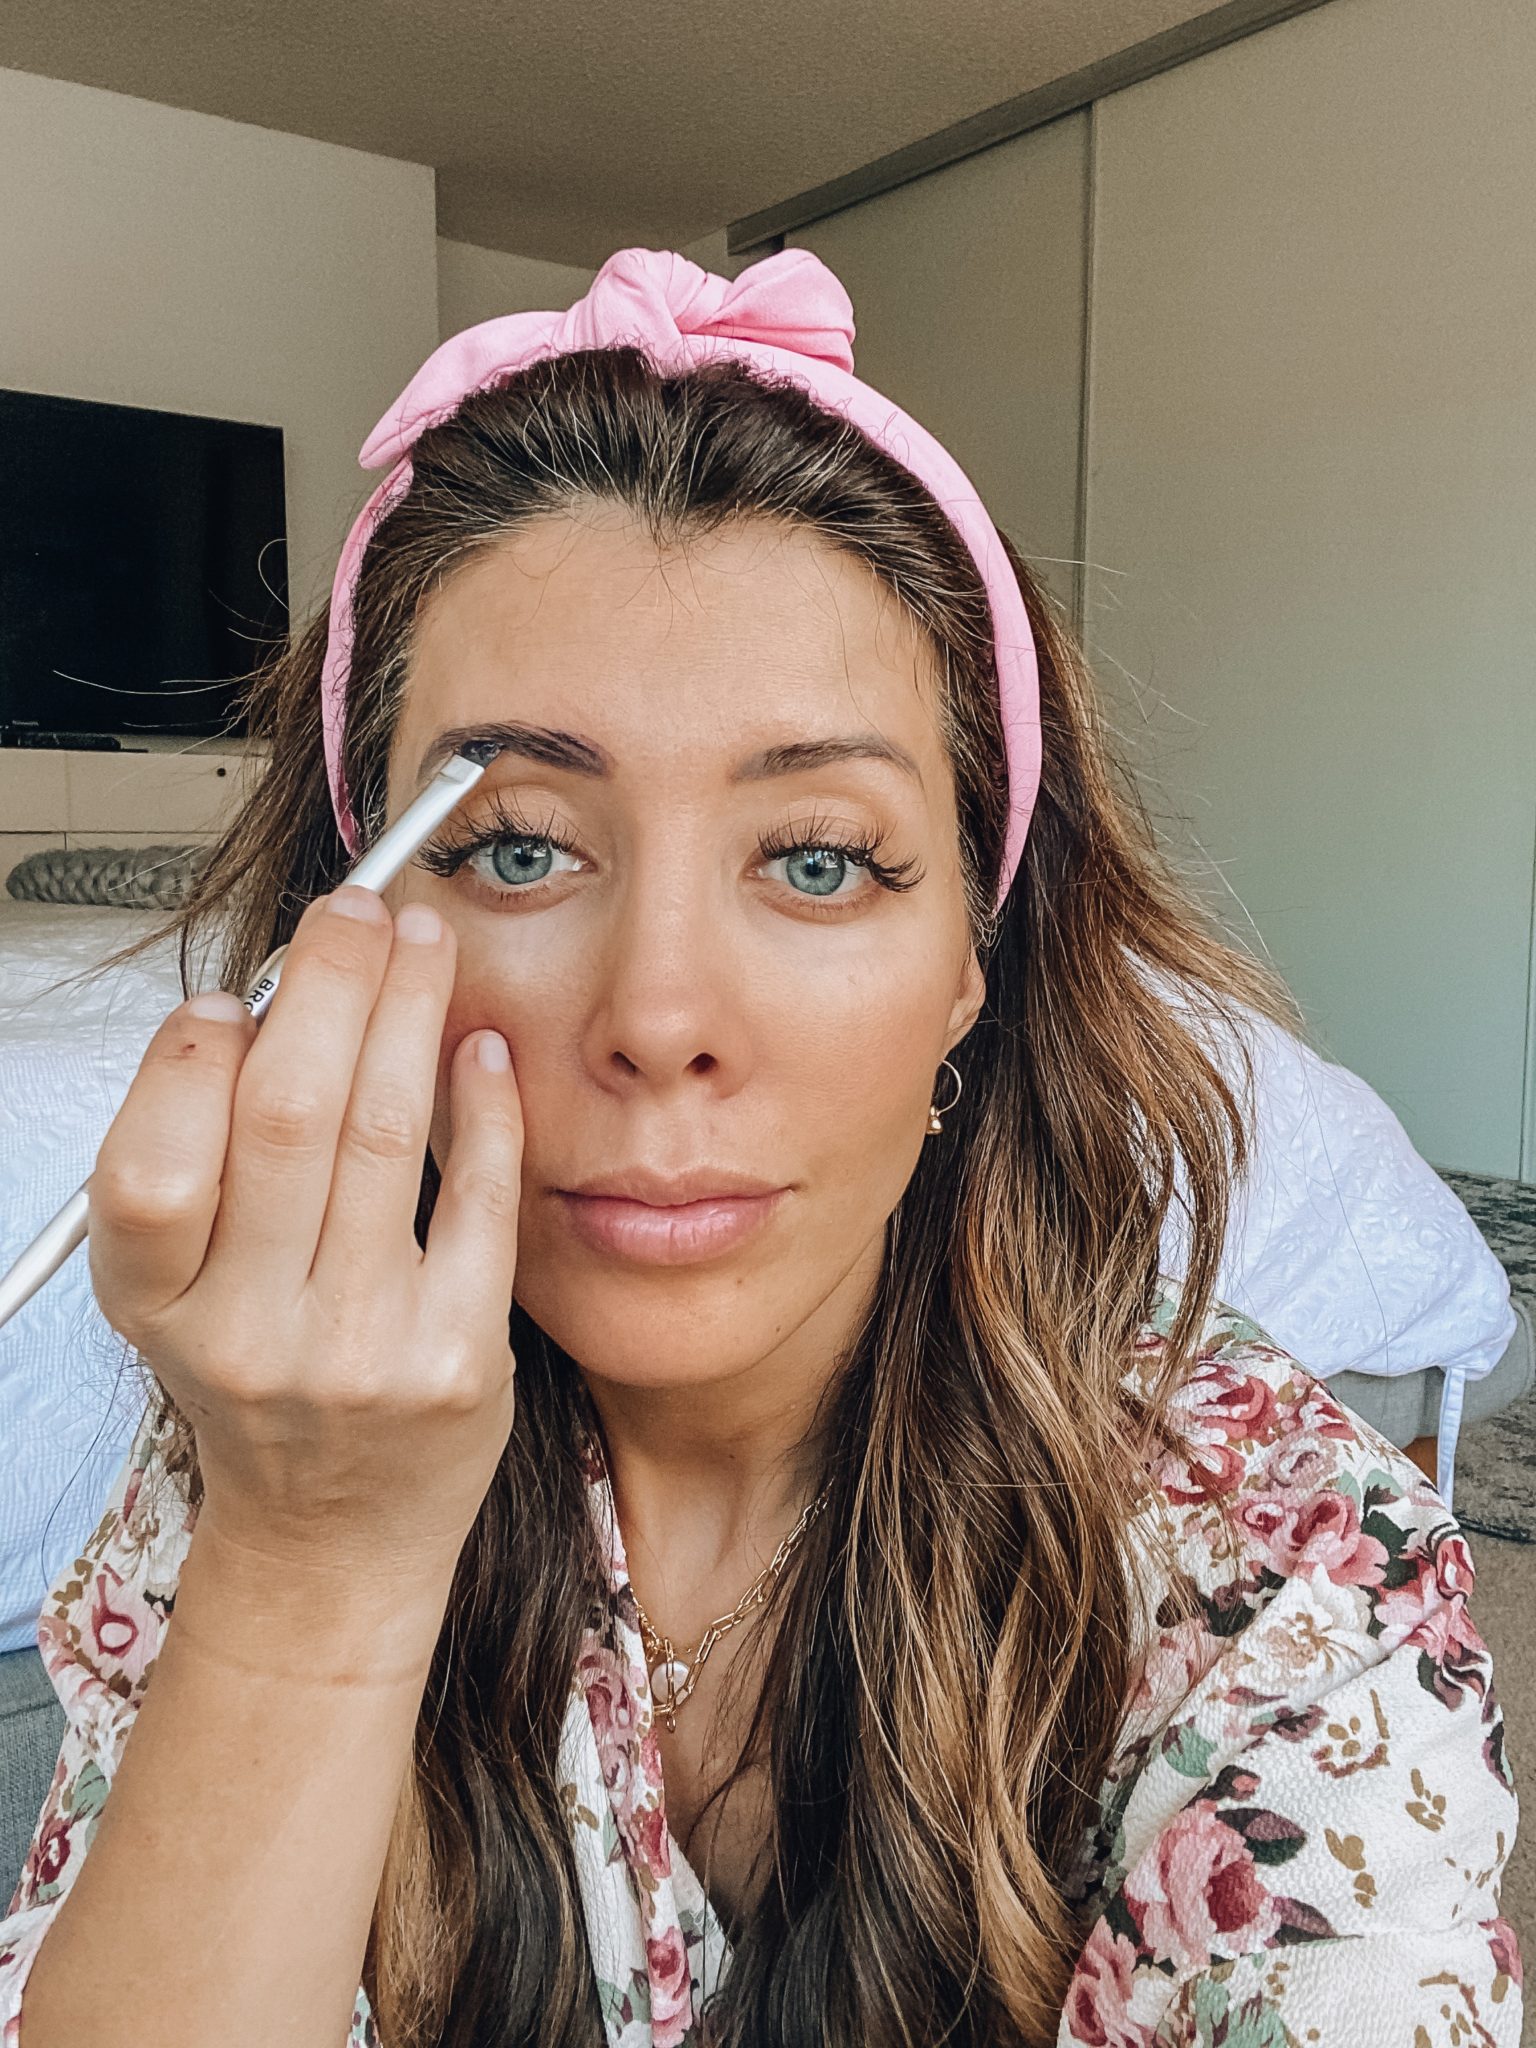
To apply the brow dye, I use an old eyebrow brush. If you purchase the kit on amazon, a brush is included that you can use. When I apply the dye, I use the same application method that I use when I’m filling in my brows when I’m doing my makeup. I make sure I follow the outline of my brows and I don’t get any dye on my skin around my brows. This will dye your skin, so be careful!
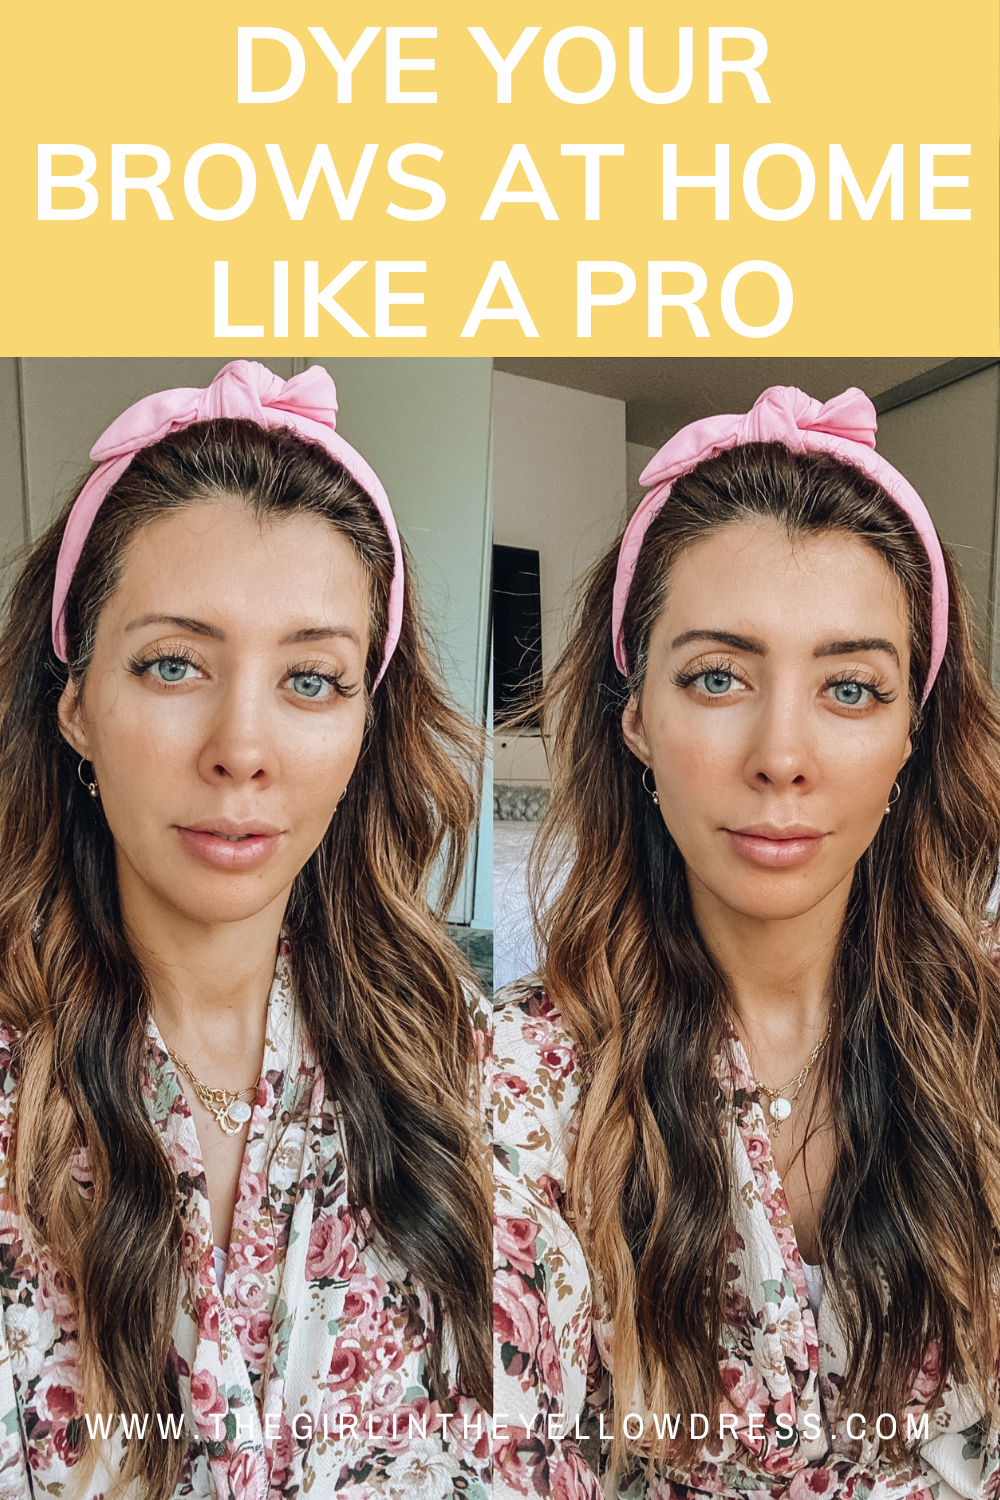
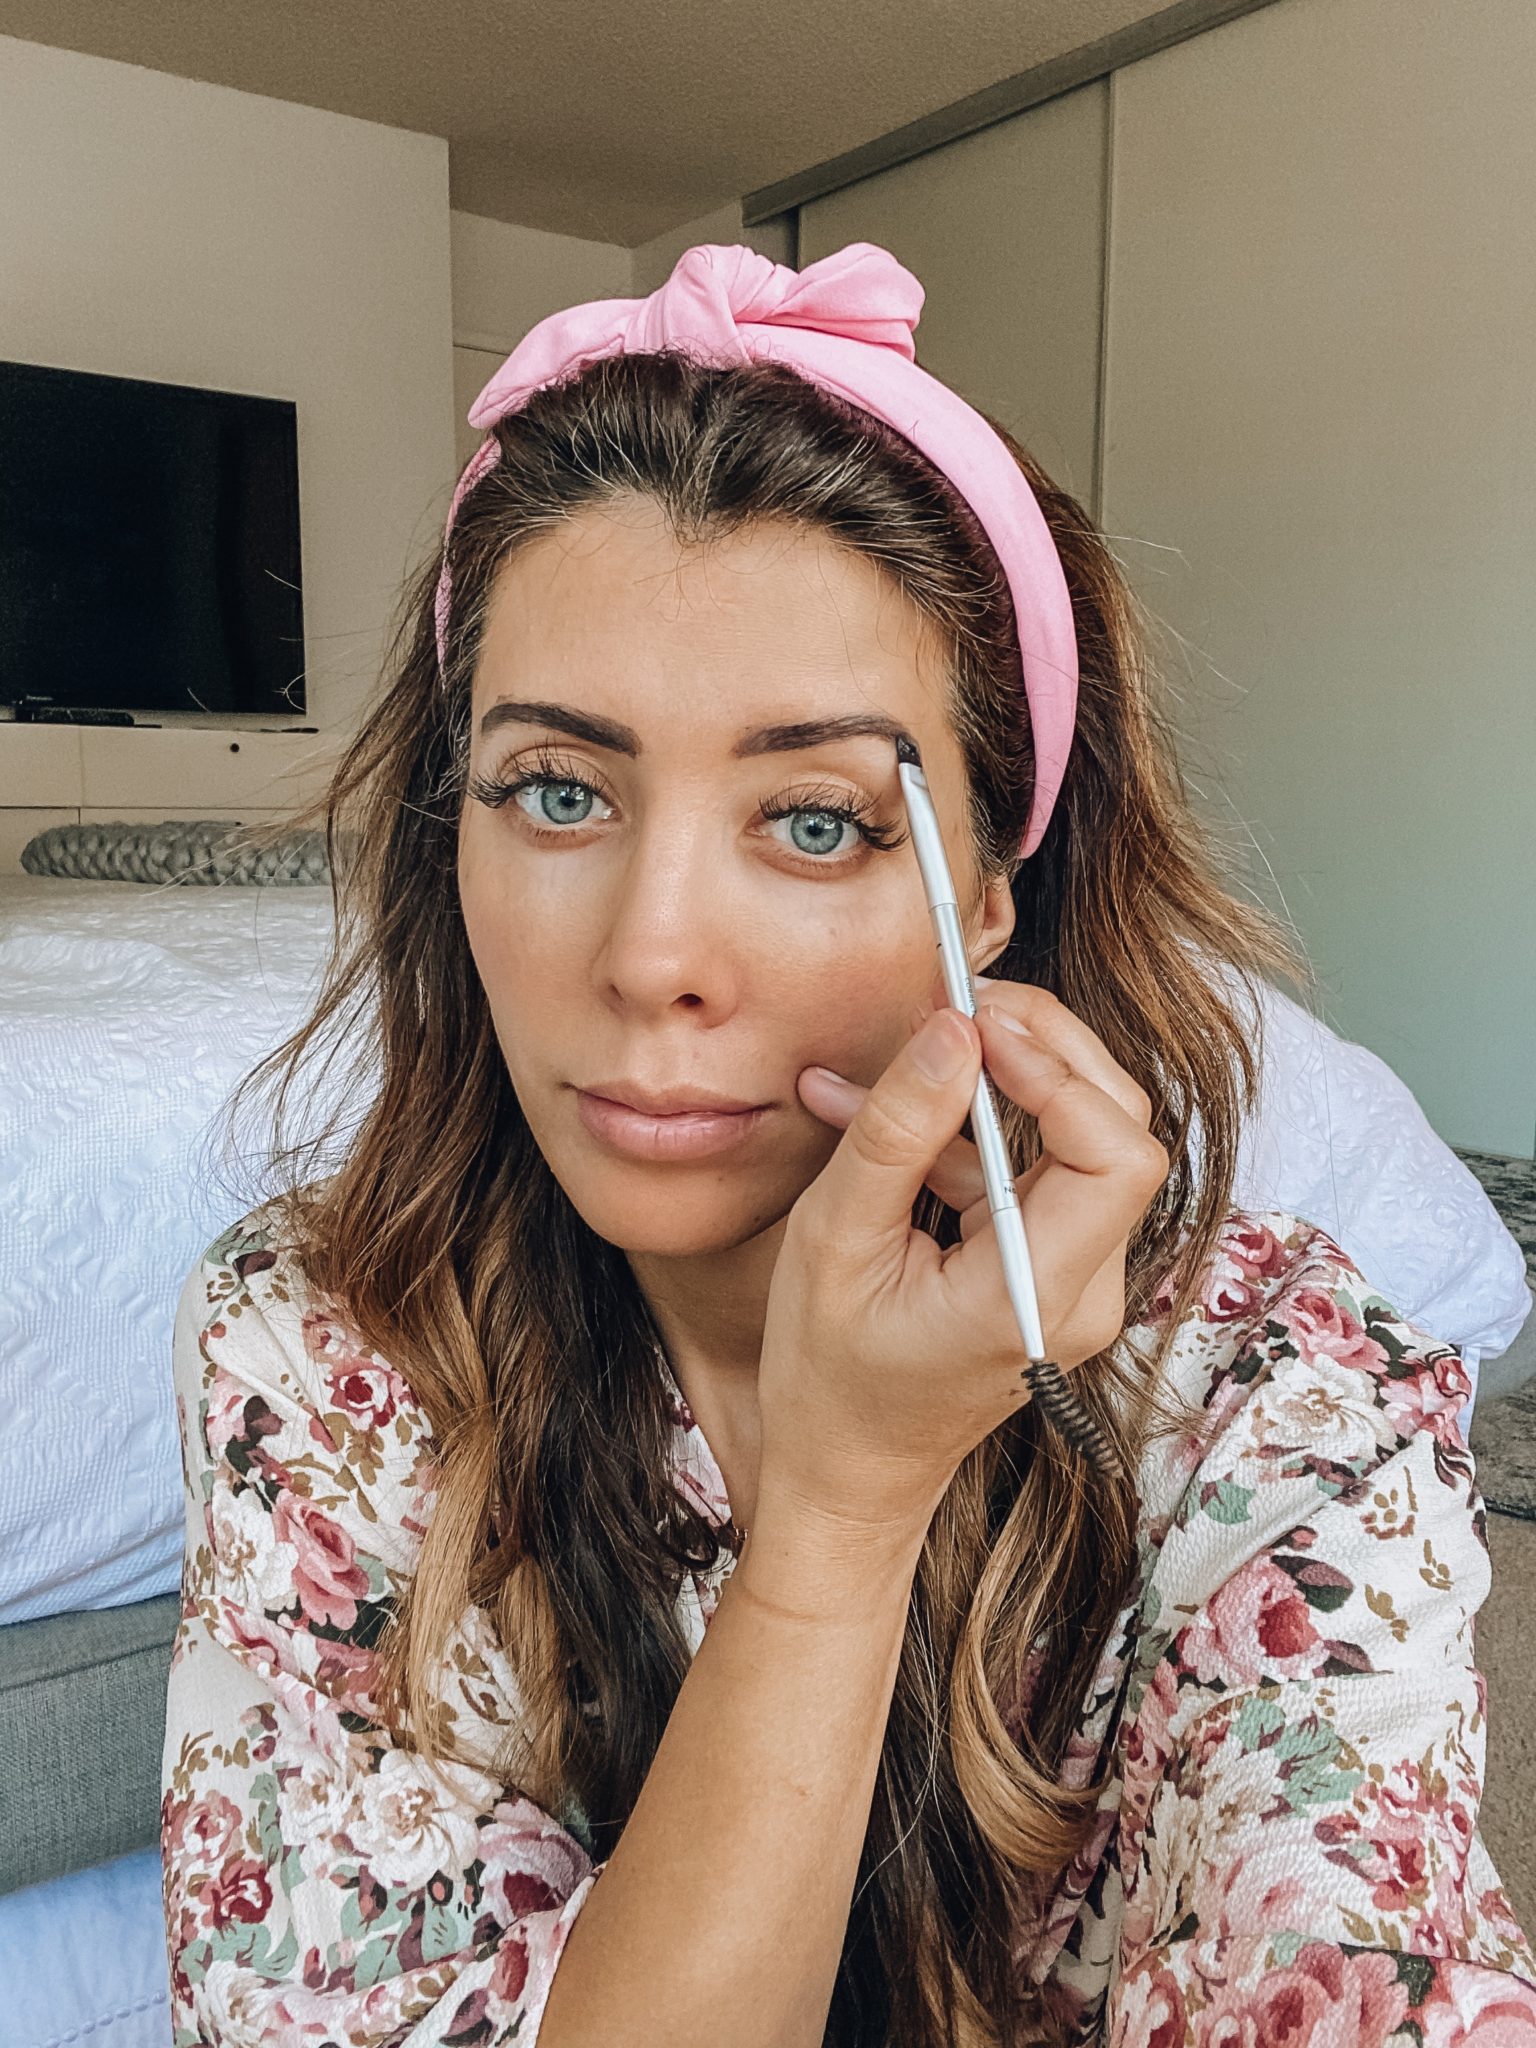
One of the reasons that I love the look of professionally dyed brows from home is that even the lighter brow hairs get darker with the dye. Everyone has light and dark brow hairs, no matter how dark your hair actually is. When you dye your eyebrows, you can make sure that even your lighter brow hairs are more visible. This is especially great when you start to go grey!

You can see what a difference dying my brows make in the picture above. I’ve just done one eyebrow and the other brow hasn’t been dyed yet. It’s crazy what a difference it makes!
Step 3
Once I’ve applied the brow dye, I let the dye sit on my eyebrows for 3-5 minutes. You don’t want it to be on too long, or it will get really dark. This is something you can figure out through trial and error. I prefer to leave mine on for no more than 5 minutes.
Step 4
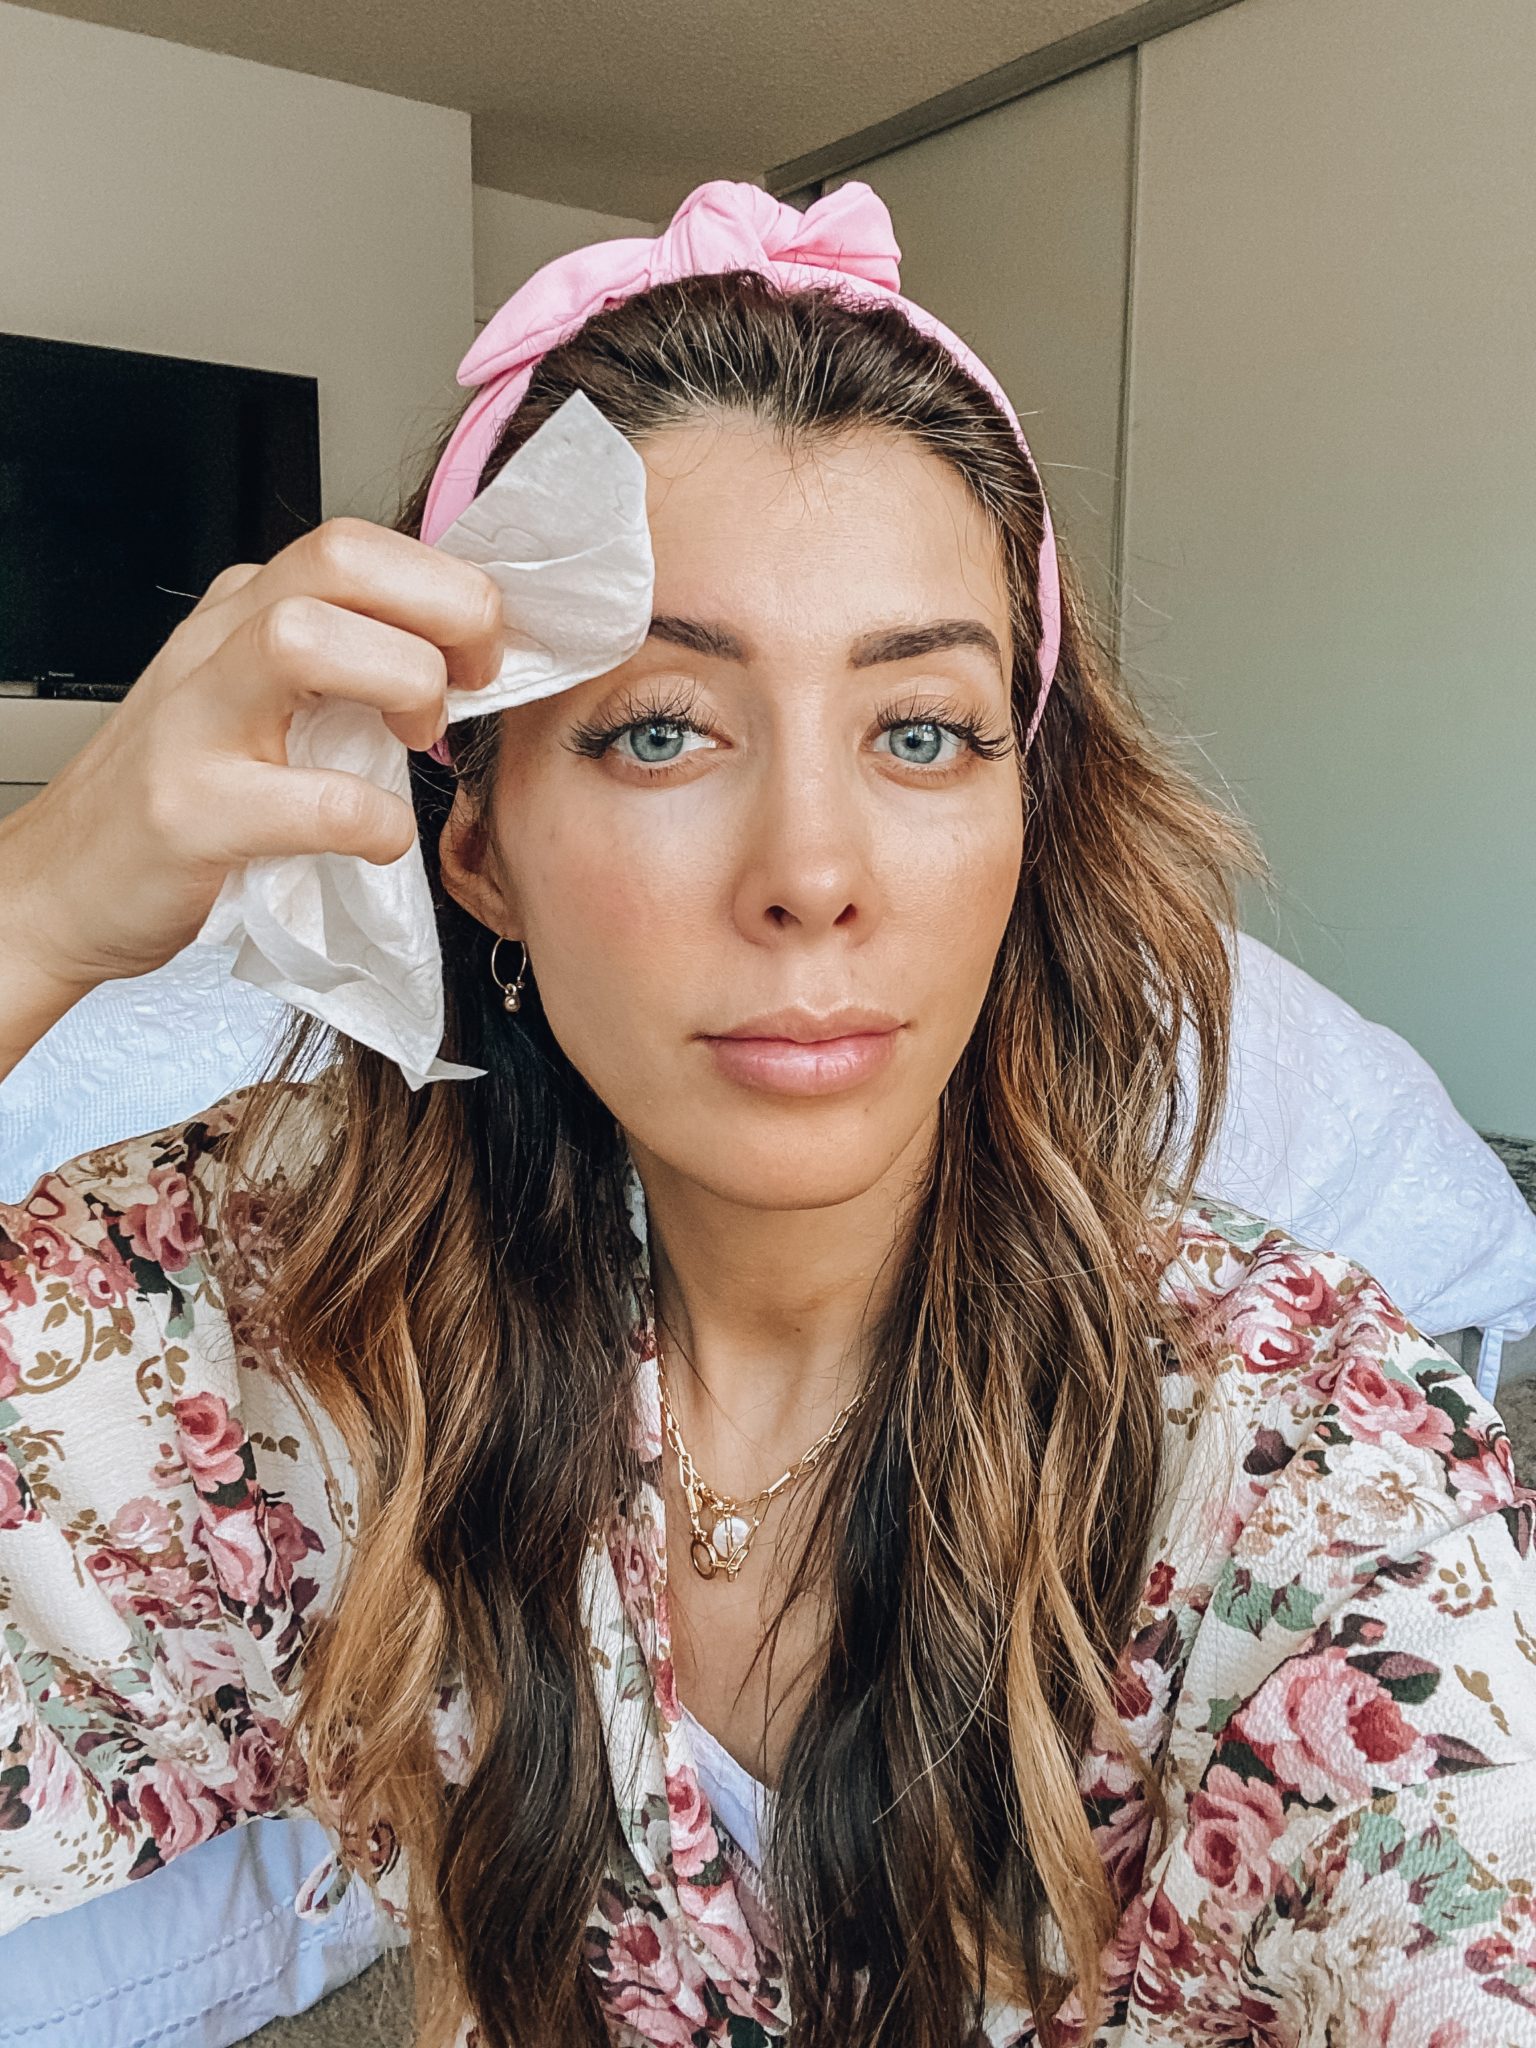
After my eyebrows have absorbed the dye for 5 minutes, I use an old wet rag and gently wipe off the dye on my brows. Be careful to not wipe dye on your skin, so you don’t end up with smudges around your eyebrows.
Step 5
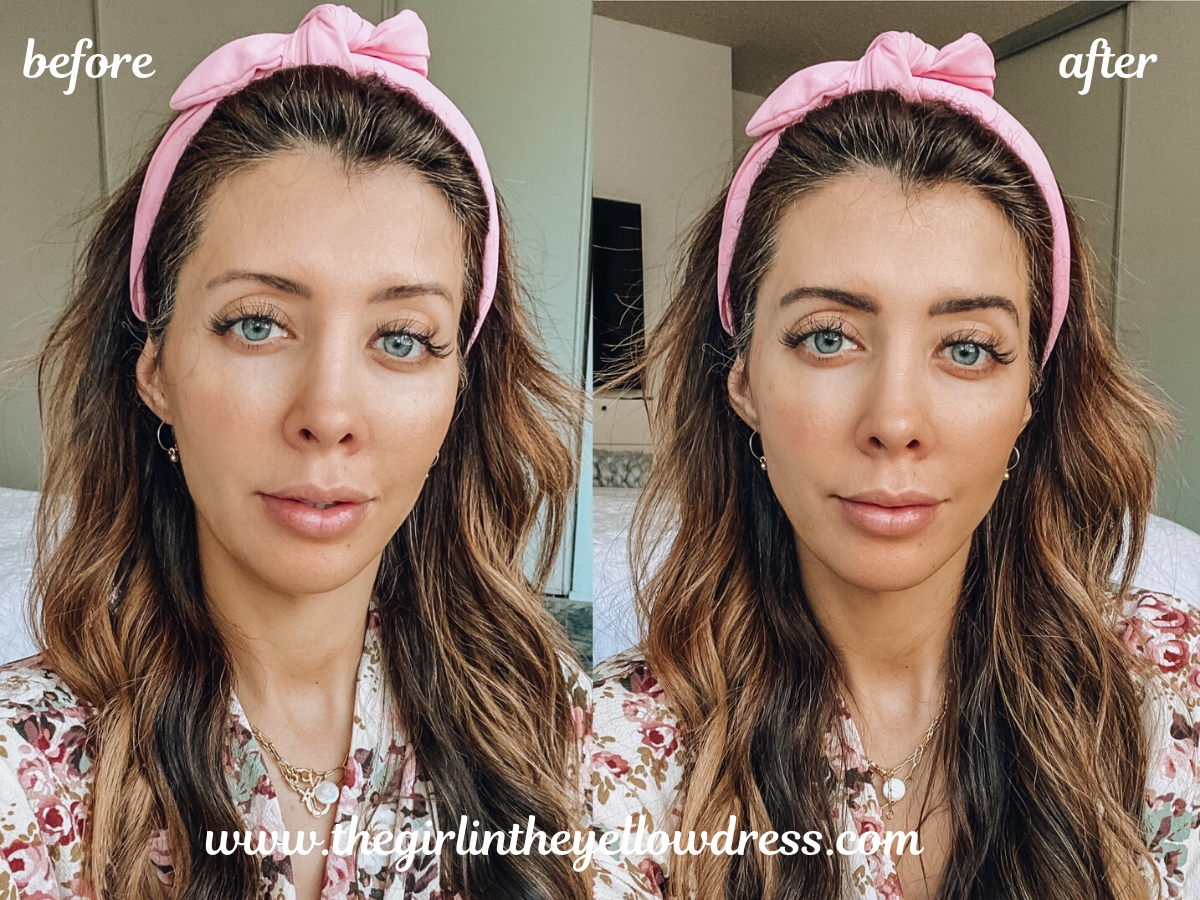
The last step to getting professionally dyed brows from home is to admire your work! I love the look of dyed brows from home. The bonus is that it makes my makeup routine so much faster! Have you tried this before?