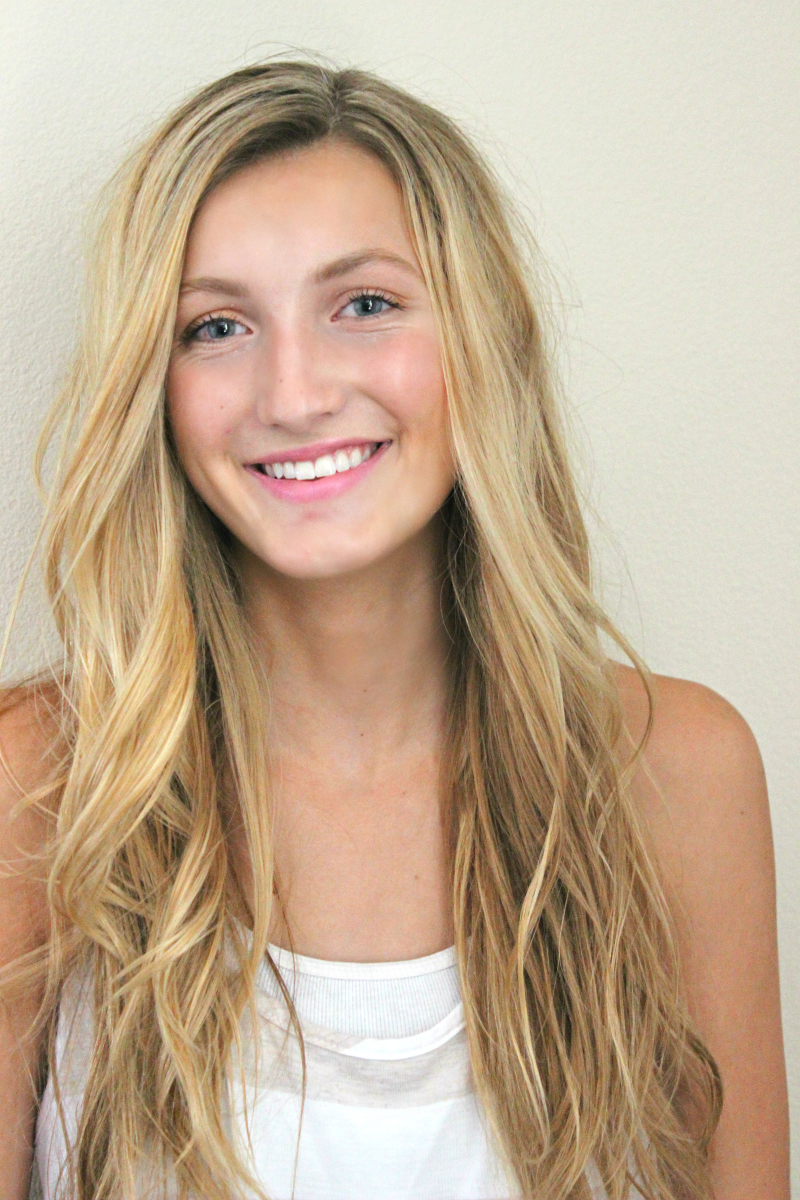
Isn’t this client of mine beautiful?! And she is the sweetest! She looks great both ways! And I can’t believe she is only in high school. A lot of people have asked me to show more of the work I do. I just never take the time to do before and after pictures. I am going to start doing a better job sharing the hair, lashes, and makeup I do.
This look is for anybody, especially if you want to save a buck or two, but I geared it more towards my high school and college aged girls. It’s fast, easy, and makes you feel put together without spending too much money! Here are a few tips that will help keep some extra money in your wallet.
Trying to save money in the salon?
1. Instead of getting a full head or partial hightlight, you can just get a few highlights around the face like I did for my client in the picture above. It still looks great and brightens up the face. Then I added a clear shine color on the rest of her hair (more about that in another post soon). It gives a shine to your hair like a color would, but doesn’t despot any color pigment on the hair. If you have dark hair, a clear gloss is great to do every other time. Just alternate it with your color.
2. Get a long layered, textured cut like I did to my client in the picture above. This can do wonders on hair, especially long hair. If you don’t have money for both, I would say get the cut over a color, it makes your hair look healthier and curl better. Just make sure to find someone that is experienced in textured layers for long hair so they blend well.
3. I sprayed “It’s a 10 Leave In Conditioner” on her hair while it was damp and blow dried it with a round brush. Then I used a smoothing serum. My favorite is Morocaan Oil, but if you are looking to save a buck or two, use coconut oil instead (see picture above). It works almost as good and it’s a fraction of the cost. Just make sure you use a small amount because a little bit goes a long way. I curled her hair with a 1 1/2 inch curling iron and did this quick & easy, loose curl on her that I talked about in this tutorial.
Looking for ways to save on makeup? Here are some that are affordable options that still look and work great, and you can use them every day.
This makeup is a very natural (great for first time makeup users, or a everyday look) and its so easy and simple to do. These are great options for high schoolers. Here is what I used.
Face
Maybelline Baby Skin Primer: Apply a small amount of this all over face.
Maybelline BB Cream in light: Rubbed a dime to nickel size amount all over face with fingertips.
Magic Lumi highlighter in light: lightly put this under the eyes and along the sides of the nose (did a little highlight and contouring on her but not a lot).
Benefit Hoola Bronzer (cheaper one here): Brushed this under her cheekbones and all along the jaw line and lightly on the forehead.
Dream Bouncy Blush (not pictured): Lightly bushed this on the apples of her cheeks.
Eyes
Anastasia Brow Powder in Taupe: I just wanted to add a little, I lightly brushed on her brows.
Too Faced Shadow Insurance (cheaper one here): applied this all over her eyelid. Helps with eyeshadow to last all day long.
Lorac Pro Palette (dont mind my old one in the picture, had it for years): One thing to splurge on is this eyeshadow palette. I am obsessed with it. It goes on smooth and last all day long. Everyone I know that uses it say the same thing. I brushed the gold color just on her lids.
Voluminous Million Lash Mascara & Voluminous Power Volume Mascara: I layered both mascara’s on top of each other. I actually got this tip from this client of mine (in the pic’s) sweet mother and I love it. It works great and makes your lashes look longer and have more volume.
Lips
Baby Lips in Pink Punch: Love this stuff it’s the perfect blend of moisture for your lips with a hint of color. They are cheap and great for every age. I love every color. My favorite is the one in the orange tube, called cherry me.
Let me know if you have any questions!! Hope you all have the best weekend!! XO
LaTisha


